After constant rainy days, I could finally install the solar panels and the roof-top antennas for my mobile WiFi router. ![]()
While it was still raining, I mounted the panels on plastic spoilers.
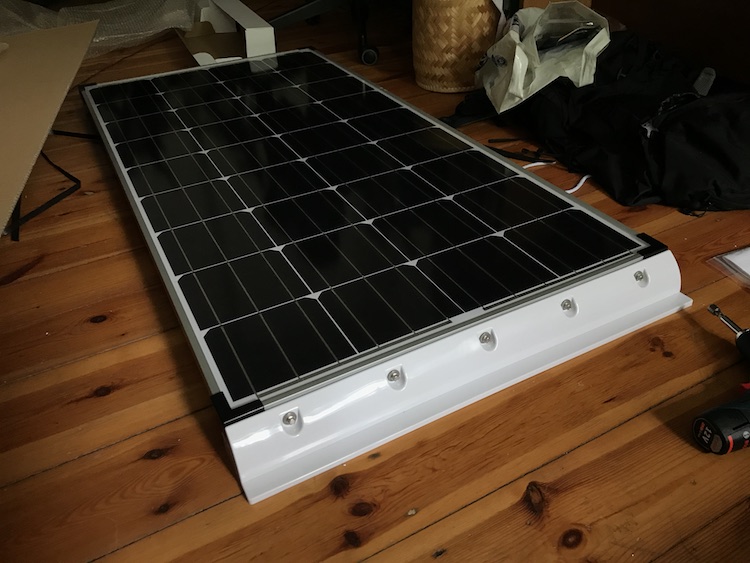
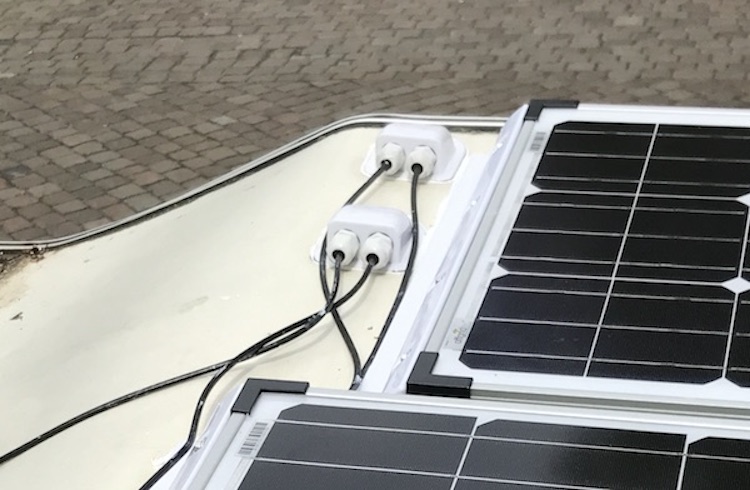
The rain stopped in the evening, so there was still enough daylight to prepare everything: cleaning the roof, marking the position for the panels and drilling two holes for the cables: one for the antenna cables and one for the panel cables.
It was already dark when I put the SikaFlex 252 adhesive on the spoilers:

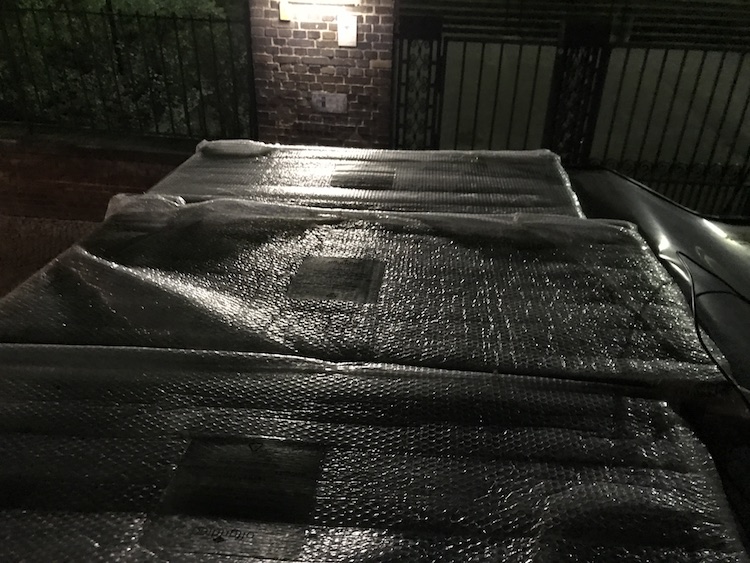
Protected and covered in bubble wrap, I adhered the spoilers with the mounted panels on the alcove:
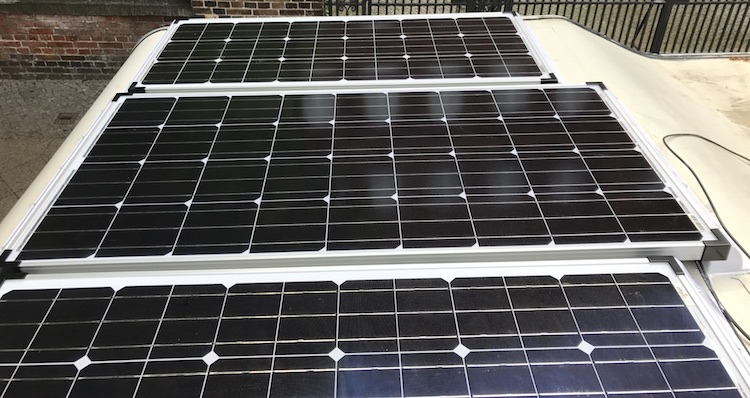
In the morning I removed the bubble wrap …
… to measure the first electricity produced on my van: ![]()
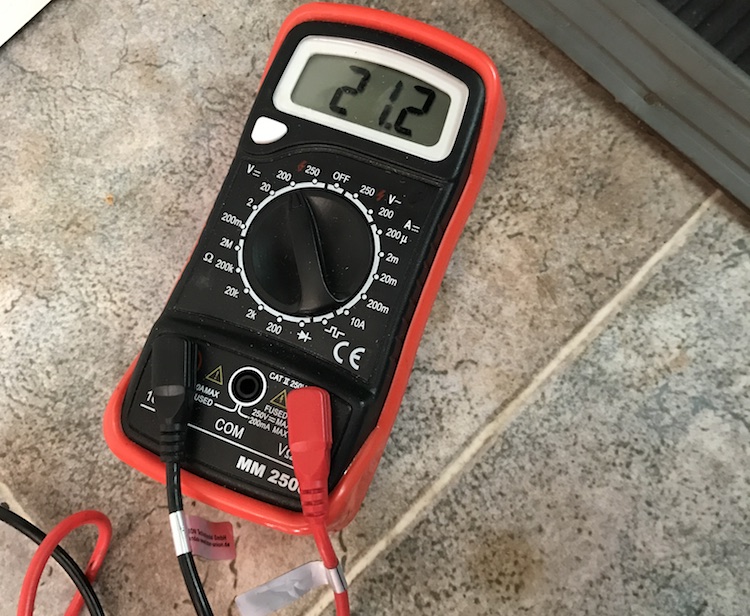
21.2V. Looking good! ![]()
Edit: In October 2017, I extended the setup with another 100Wp solar panel.
So now that I had electricity on the roof, I had to get it down into the van. I adhered two waterproof cable glands (again with SikaFlex 252) on the roof:
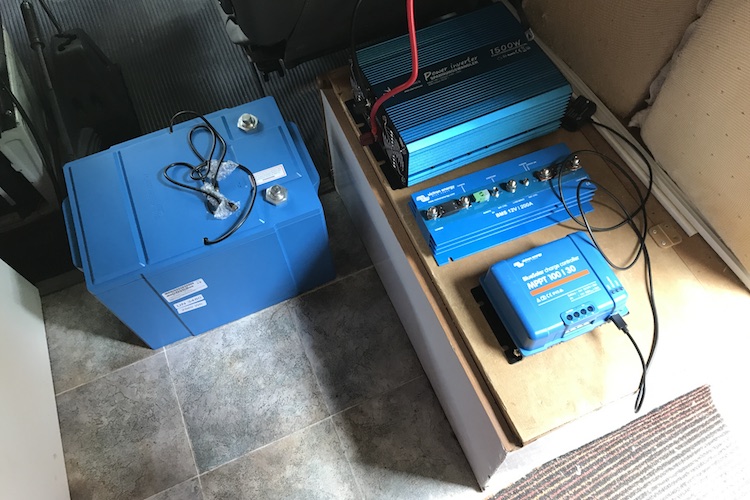
Time to wire up the battery and devices I ordered back in March:
- a 200Ah LiFePO4 battery
- a voltage converter
- a battery management system
- a MPPT solar charge controller
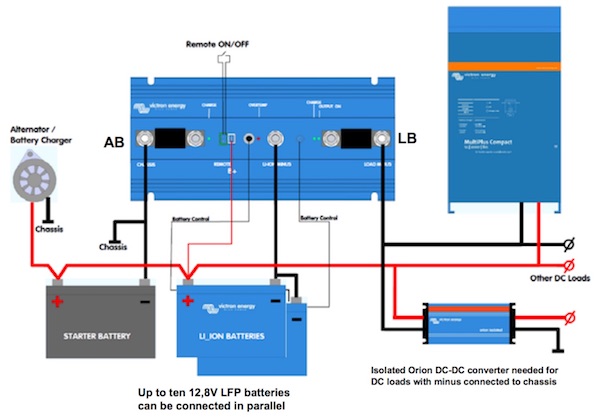
I planned the wiring based on the diagram provided by Victron Engergy in the docs for the battery management system:
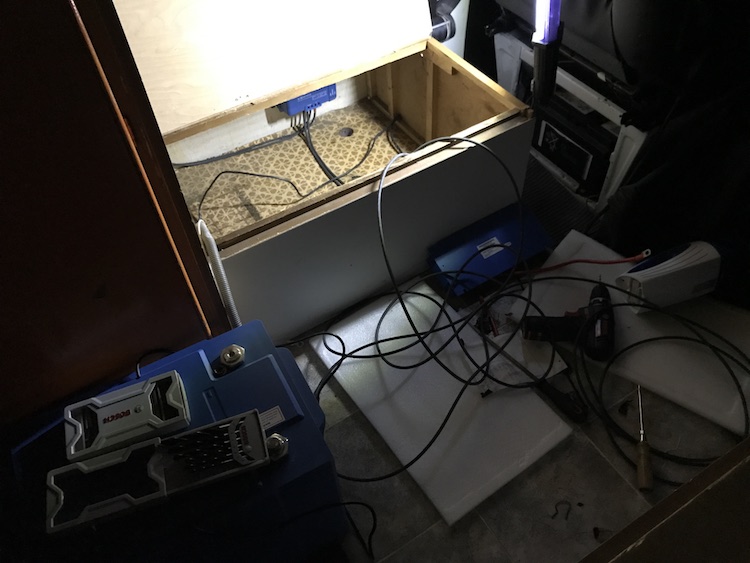
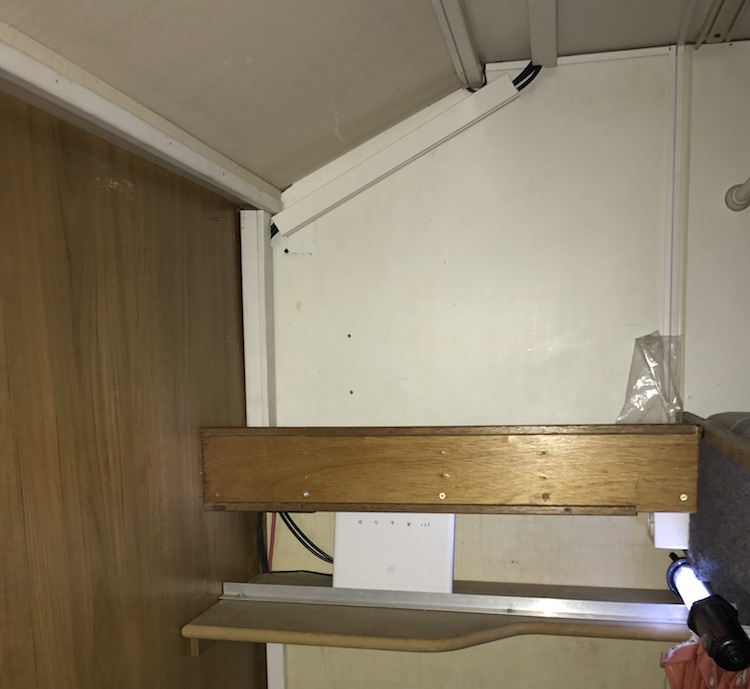
I removed the old battery from the wooden box behind the driver’s seat to make some space for the new high-tech setup.
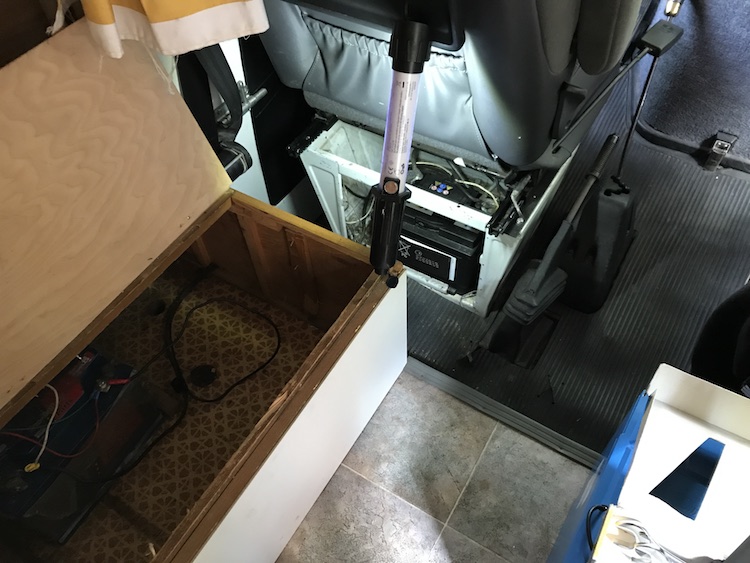
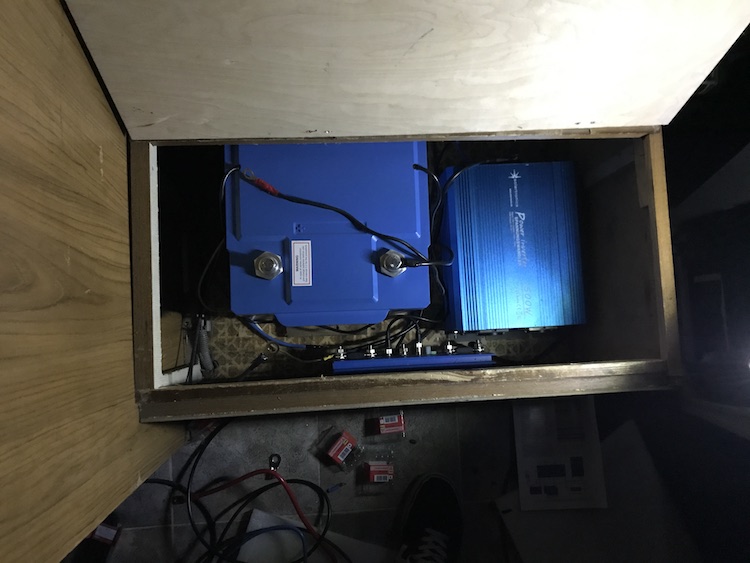
First I installed the solar charge controller and connected it to the cables coming down from the roof:
It will convert the voltage delivered by the panels to optimally charge the battery. Its plus cable is directly connected to the battery whereas the minus cable is connected to the LB (load minus) connector of the battery management system (see diagram above).
After playing some Tetris with the remaining devices everything found its spot in the box:
Definitely not required but nice to have, I connected a bluetooth dongle to the solar charge controller.
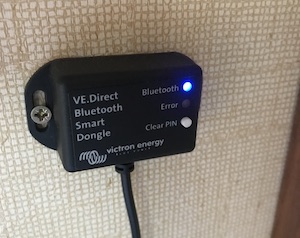
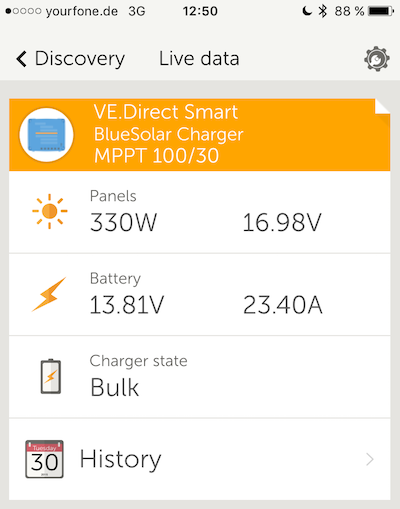
It sends some real-time and historical data of the charge controller via bluetooth to my smartphone. I enjoy observing these numbers so much. ![]() Especially around noon when the sun was all straight up and my panels almost reached their maximum specified power of 350Wp:
Especially around noon when the sun was all straight up and my panels almost reached their maximum specified power of 350Wp:
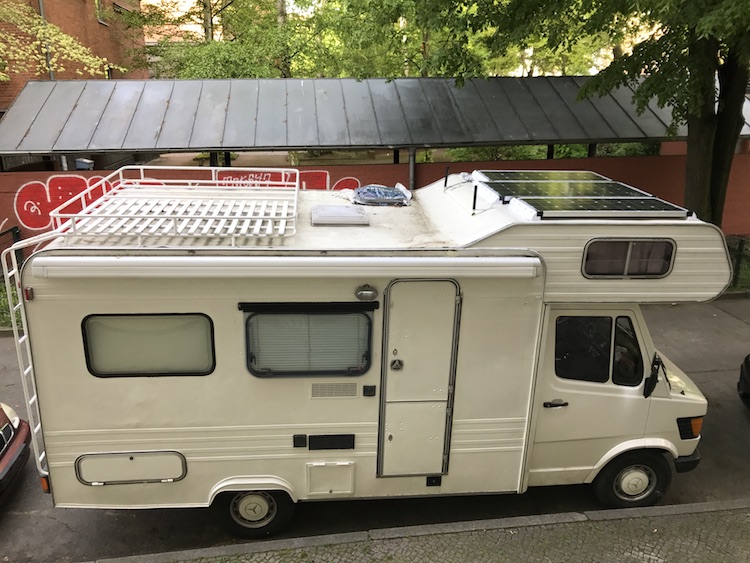
Awesome! My solar panel is installed and ready to deliver all the power I need. ![]()
The only thing left for a proper office: internet. I picked the Huawei B315s-22 LTE WiFi router because it can be operated with 12V and provides two SMA connectors for two external antennas: one for sending and one for receiving data.
Based on some experiences from other van people I bought two MIMO antennas.
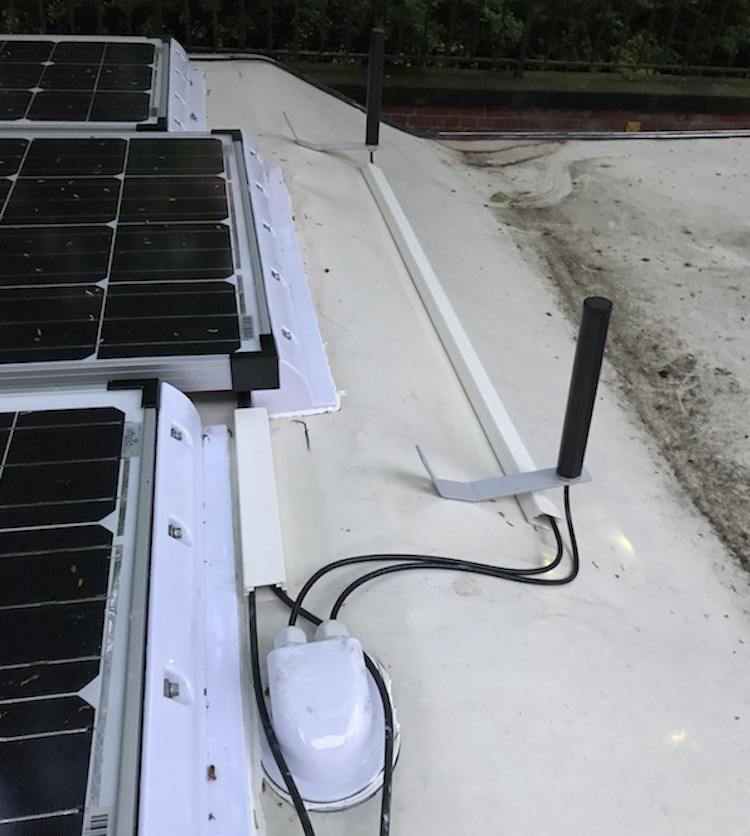
Mounted on the roof and connected to the router inside, these antennas deliver better signals than the built-in antennas or my smartphone.
Done: my mobile office is finally ready for the first test run. ![]()
So excited! ![]()