Similar to all the other components that I built for my previous van, I identified areas for improvement in the seating arrangement as well: During winter, I frequently experienced cold feet as the space under the table lacked proper ventilation from the wood stove’s warm air. To achieve genuine comfort, I needed to insert a cushion or similar support between the vertical backrest and my back, creating a slightly inclined seating position. While working, I noticed a consistent habit of pulling the movable table towards my body, causing it to extend beyond the edge of the bench. In this setup, I could comfortably use my laptop while leaning against the backrest. It served well for solo use, but when accommodating a guest who wished to work facing me, either one person endured an uncomfortable position, or both found themselves in a suboptimal situation. Design-wise, it would have been more favorable if the table extended over the edges of the benches on both sides.
Refining the concept
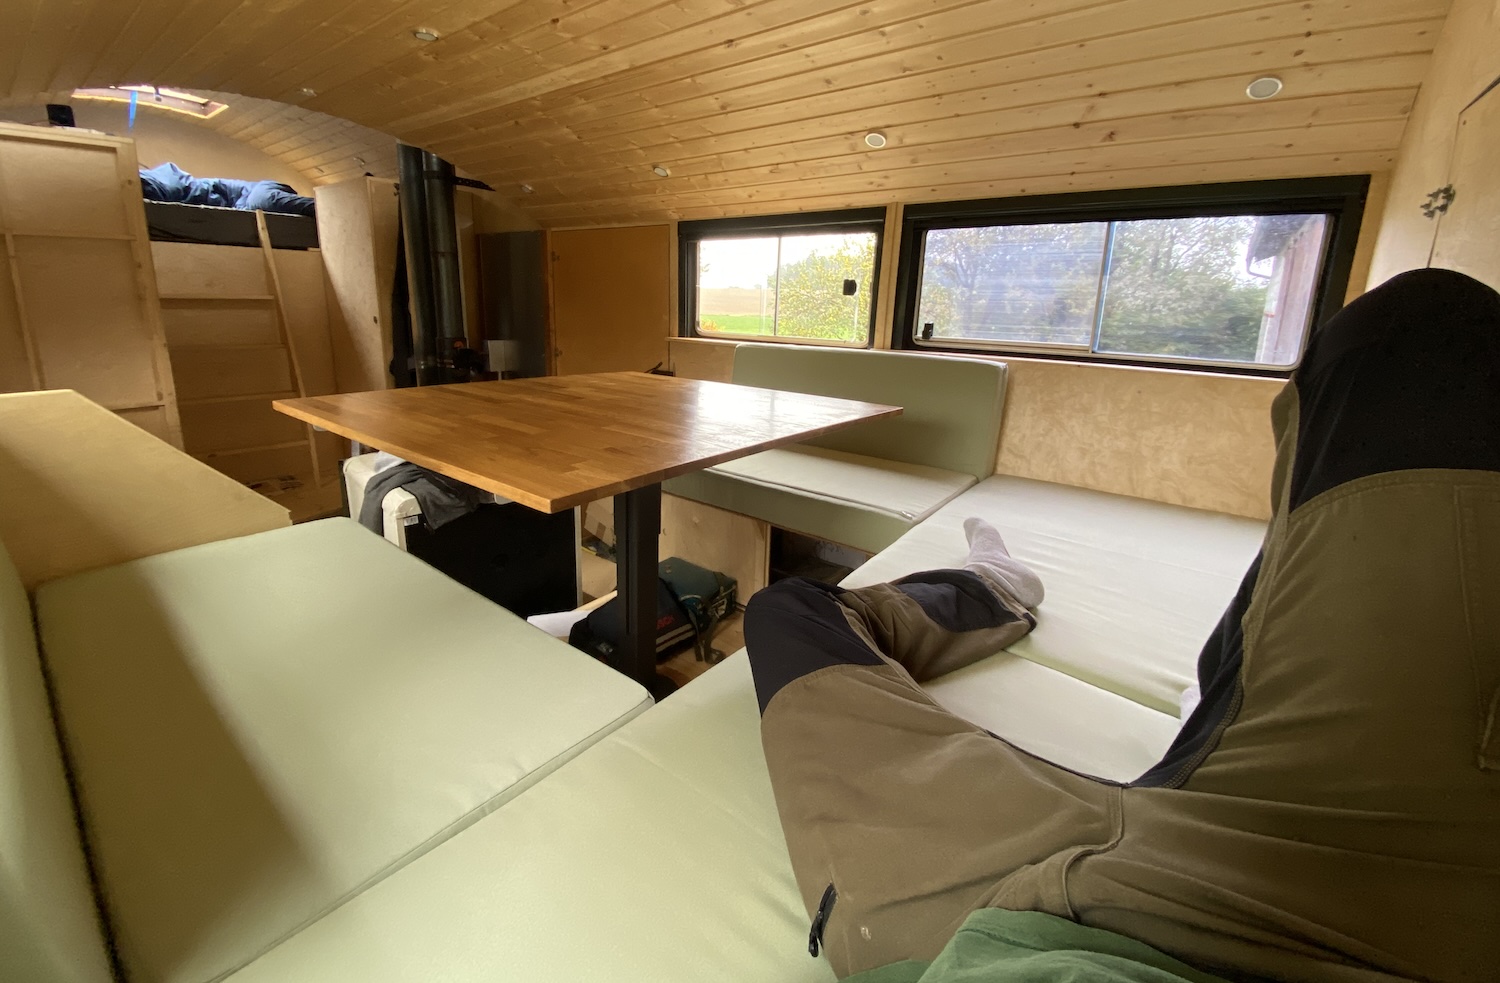
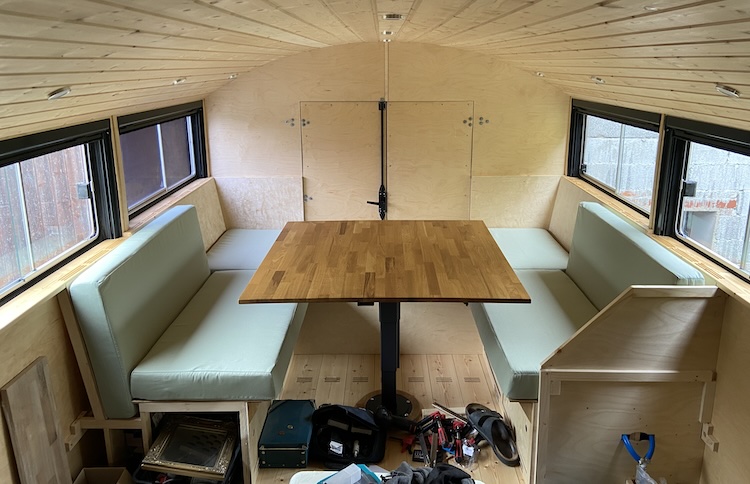
I incorporated these insights into the design of the truck’s concept, creating an improved and more spacious version of my van’s seating area: Positioned at the center, a large, sliding, and rotating table would provide enough space for two workstations. Following the layout of my van, a U-shaped seating area would surround the table. Slightly angled backrests on both sides would ensure the most comfortable seating position. In the rear section, a daybed would provide room for at least one person to relax or sleep without the need for any adjustments. To accommodate more guests, the table would be height-adjustable, expanding the daybed for up to four people. For optimal comfort during heating, warm air should circulate from the floor and seats, ensuring a warm foot area.

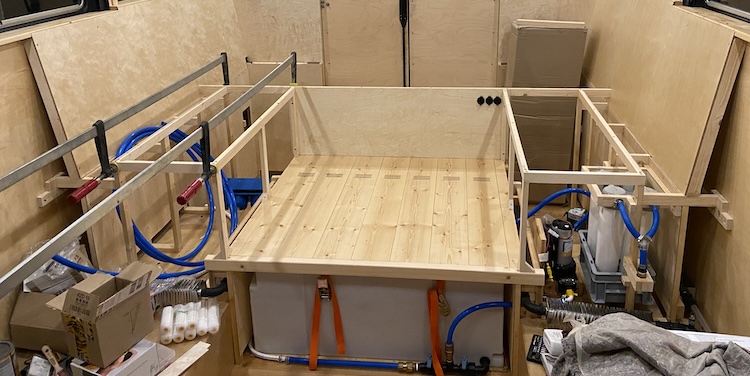
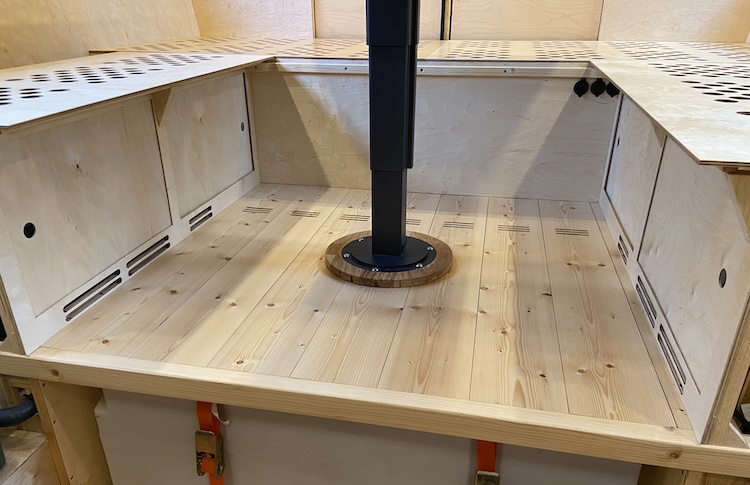
Building the double floor
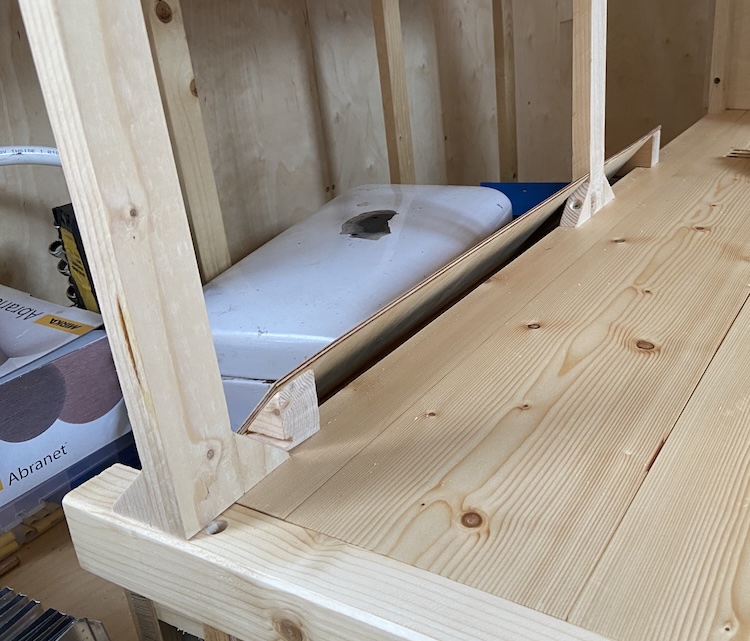
The water tank and the seating area would be divided by a double floor. To facilitate the flow of warm air from the ventilation shaft behind the water tank into the foot area, I milled slots into the thick tongue-and-groove boards forming the raised floor.
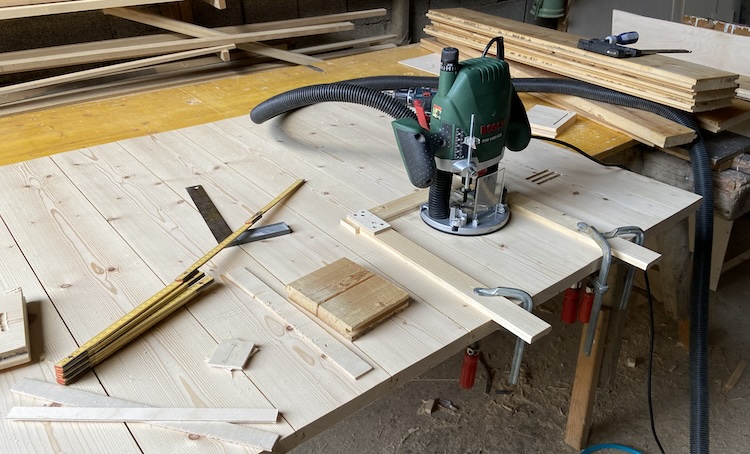
After oiling and sanding the floor panels, they elegantly concealed the water tank while offering vents for the warm, rising air.
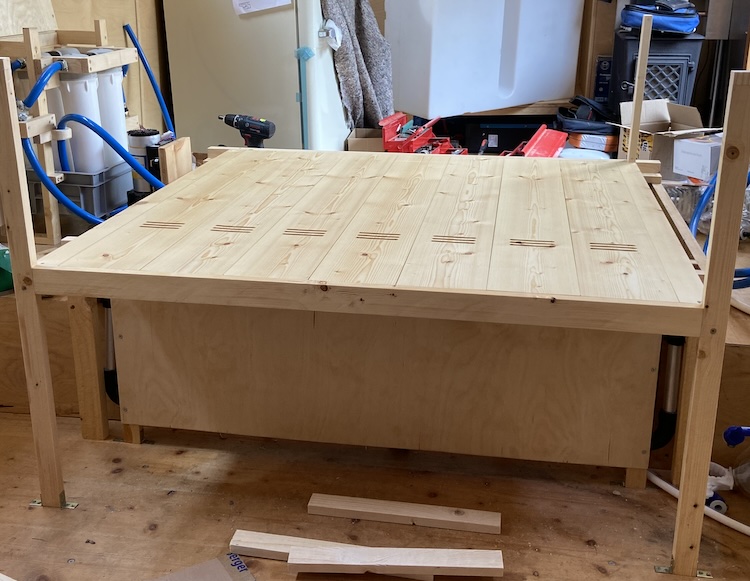
Constructing the seats
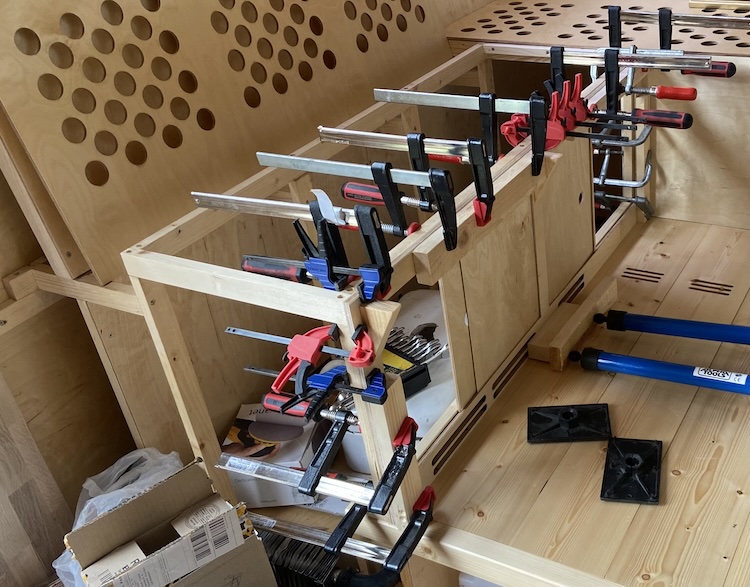
Starting at the rear, I constructed the basic framework for the seats,
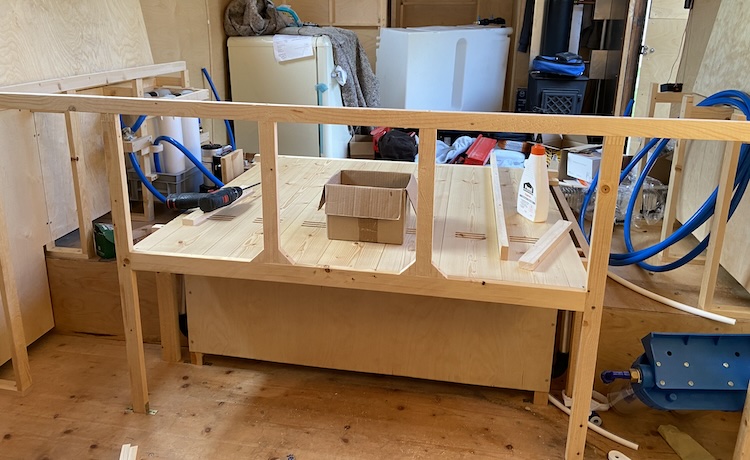
and gradually progressed on the sides towards the front.
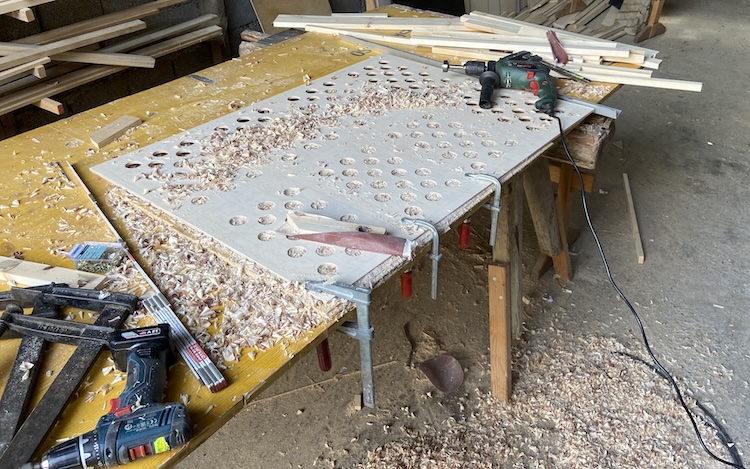
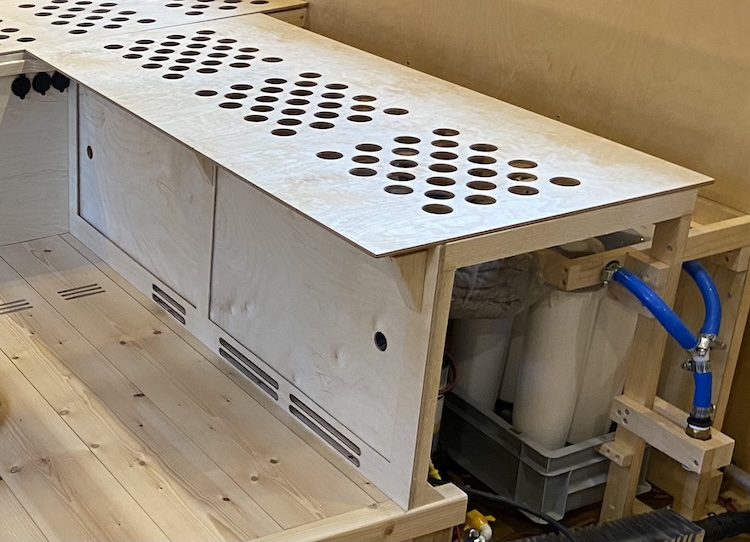
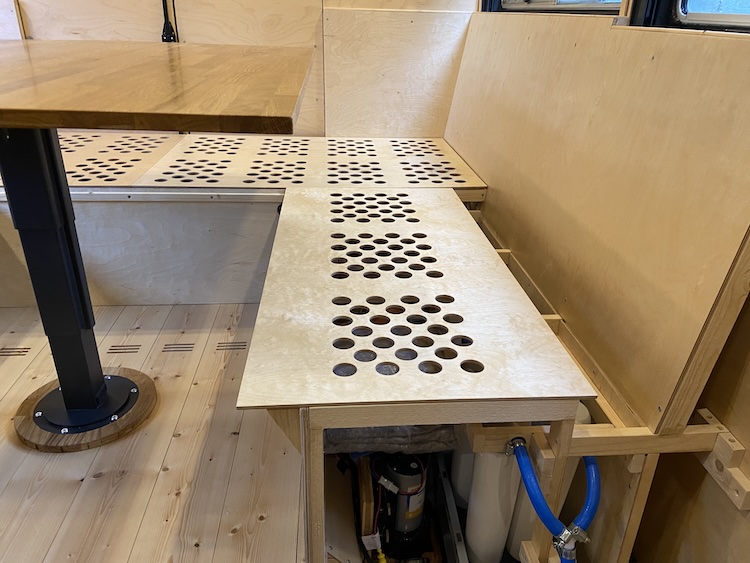
To prevent the formation of mold in the seat cushions, I drilled various holes into the removable covers of the seat surfaces.
For additional stability and smoother opening and closing, I glued additional slats to the underside of the covers.
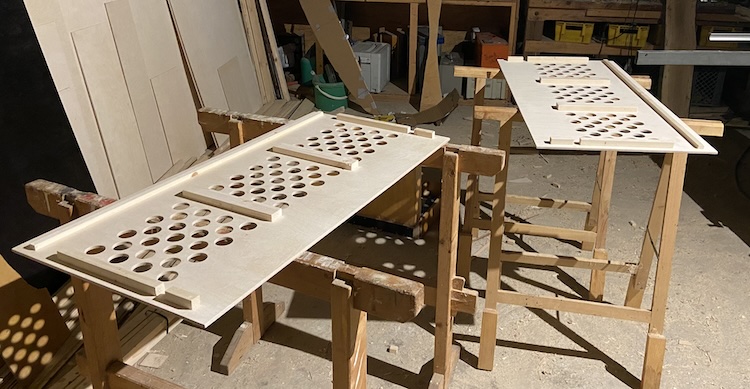
After hours of drilling and sanding, the covers were finally completed.
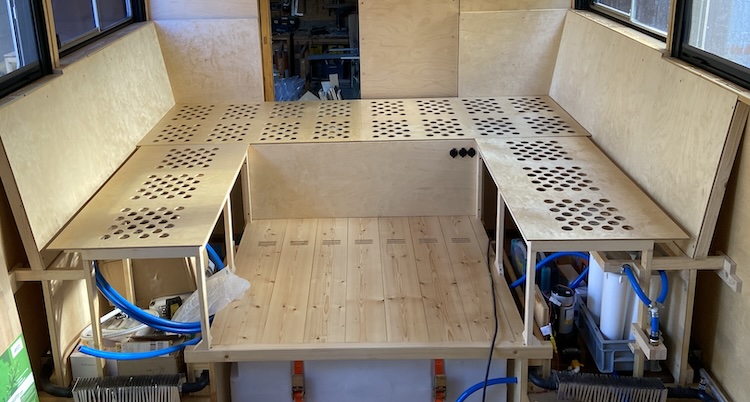
Sloped covers on the side ventilation shafts would channel the warm air towards the footwell area beneath the table.
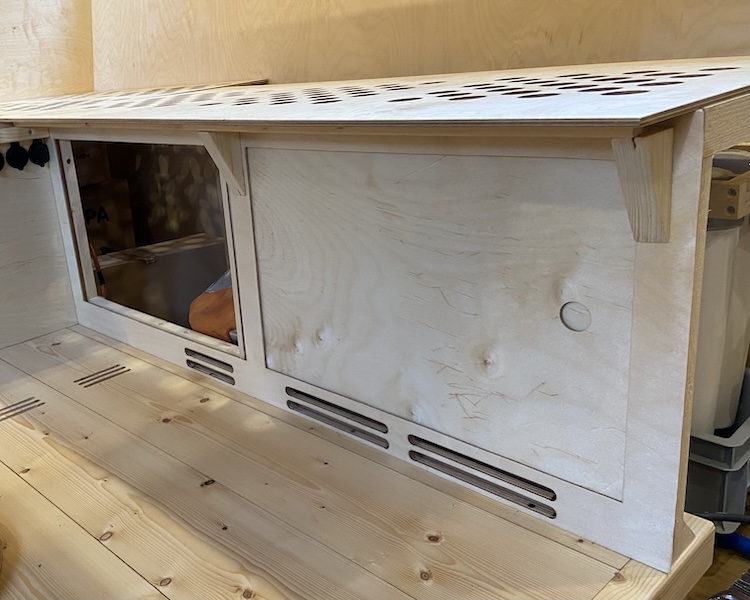
I constructed sliding doors for the front side of the benches.
When closed, they would prevent the stored items from slipping out.
And to access items, one could simply slide the doors to the side.
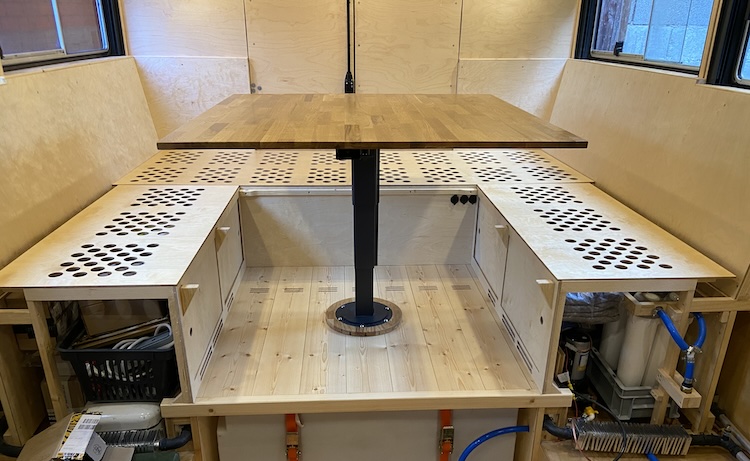
Installing the table
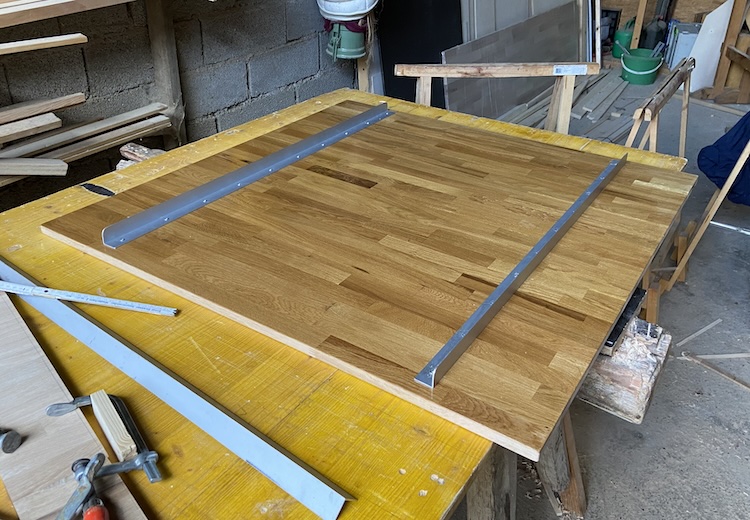
I assembled the large table top from multiple pieces of oak using large clamps.
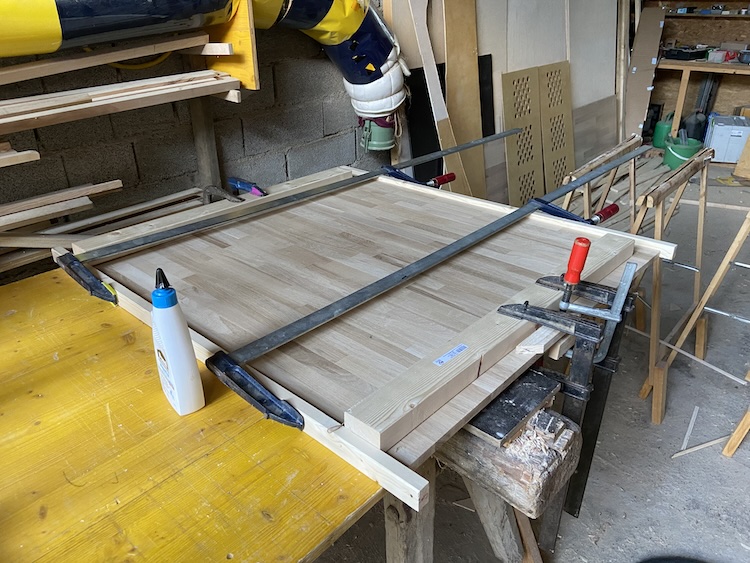
After sanding and oiling, I attached aluminum profiles to the underside to prevent the tabletop from warping due to changes in humidity.
The beautiful oak tabletop made a robust impression on the sliding, rotating, and height-adjustable table leg.
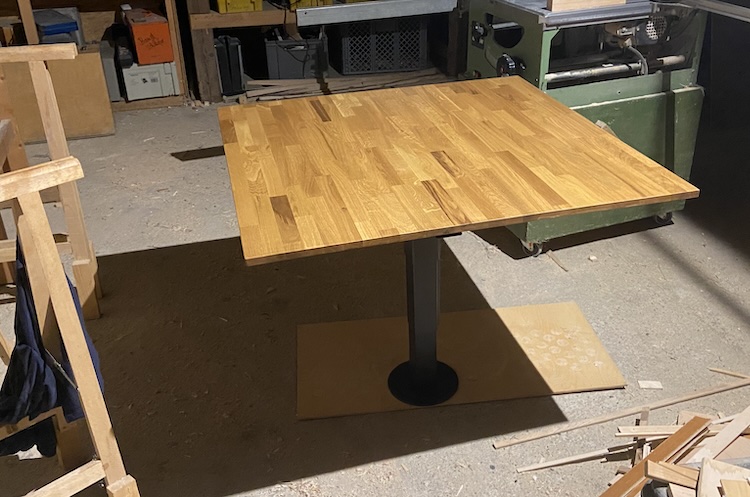
Similar to my previous van, I crafted a base from the same oak wood to securely mount the table on the double floor.
After sanding, oiling, and assembly, the construction made a beautiful impression on me.
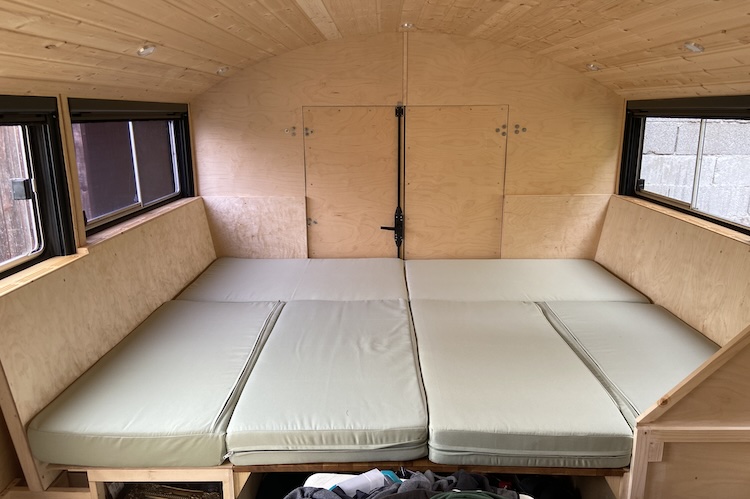
Transforming the seating area into a gigantic bed
In the seating mode, the seat covers were positioned forward to extend beneath the table, creating a gap for securing the back cushions.
For the bed mode, the seat covers were shifted to the back.
This provided enough space in the middle to lower the table seamlessly.
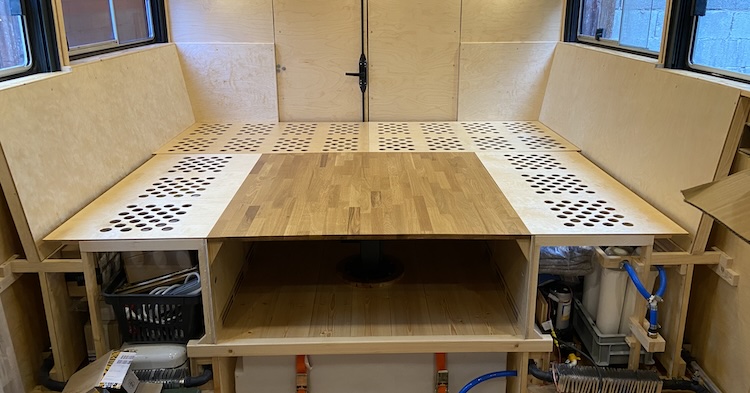
With the cushions, this resulted in a gigantic and cozy guest bed.
With a few simple steps, the large bed could be transformed back into a comfortable seating area with a daybed, providing enough space for five to six people.
I was highly pleased as the cabin gradually transformed into a comfortable and cozy space.