Overall, I was quite satisfied with the water system I had built for my previous van. However, I had discovered areas for improvement over the years: The filling nozzle went directly into the tank, meaning I always had to fill it with clean water to prevent contamination. During long stays of several months in locations with access to a well or a spring, I sometimes wished to be able to pump water directly into the water system of the cabin without having to fill the tank manually with a watering can. As I hadn’t installed a separate drain valve, emptying the tank required pumping the water through the entire system, including the filtration unit. And, of course, it would have been great to be able to store more than 90 liters.
For the truck, I envisioned an upgraded design featuring an external pump (1) capable of drawing water from deep wells and pushing it through a filtration system (2). Two control valves (4a, 4b) would allow to either direct the purified water into the cabin’s water system or store it in a sizable 200-liter tank (5), which could be emptied using a separate drain valve (3).
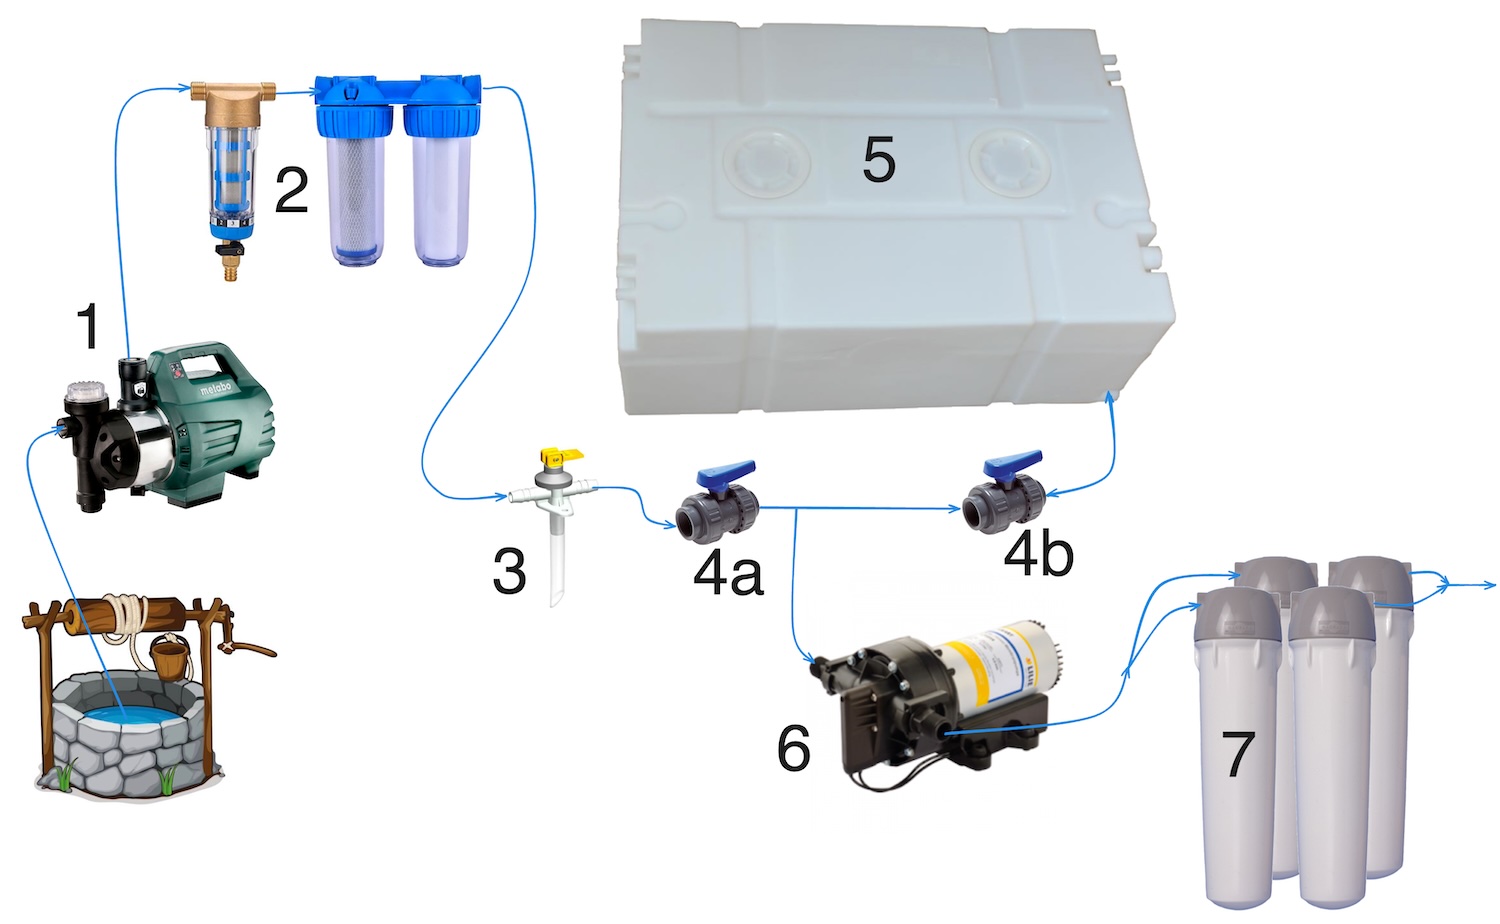
The control over the water flow would be as follows:
| 4a | 4b | Effect |
|---|---|---|
| open | closed | Water would get pushed directly into the water system of the cabin. |
| open | open | Water would get pushed into the tank (5) or drained through the open valve (3). |
| closed | open | Water would get drawn out of the tank by the internal pump (6) into water system of the cabin. |
The remainder of the setup was designed to mirror that of the van: a pump pushing water from the tank through a filtration system, ensuring the removal of germs, chemicals, and unpleasant tastes.
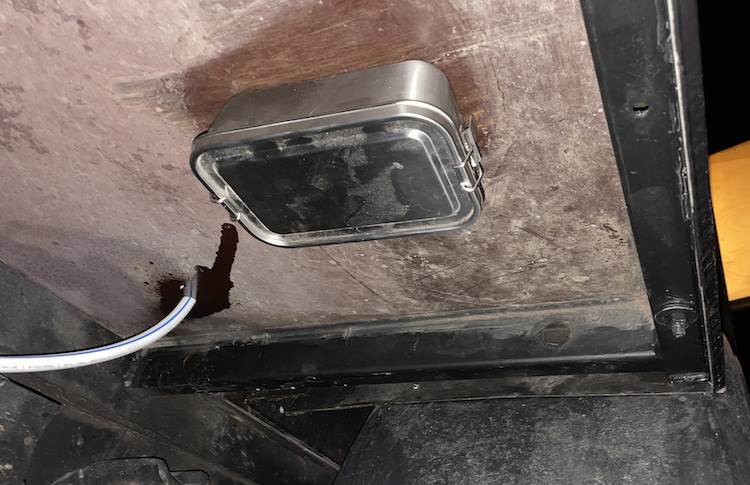
Mounting the connector for the external pump
I drilled two holes in the floor behind the right rear wheel. One for the drain valve and one for the connection of the external pump.
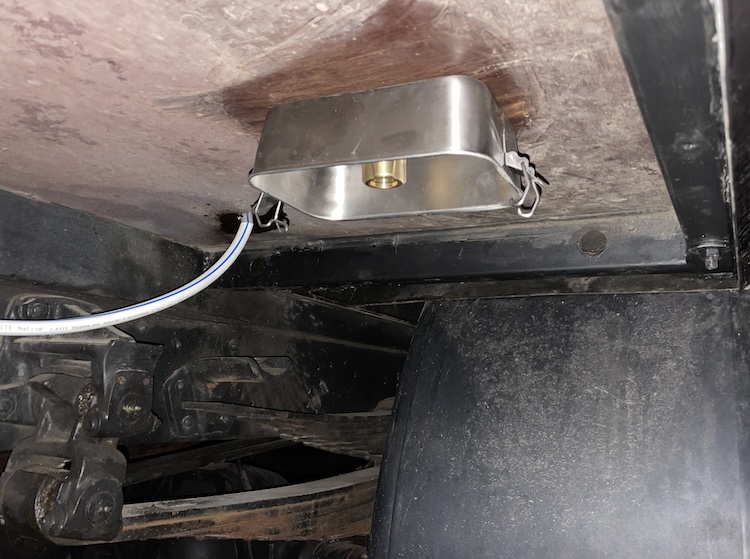
To protect the connector from dust and dirt stirred up during travel, I repurposed an available stainless steel lunchbox.
Setting up the filters
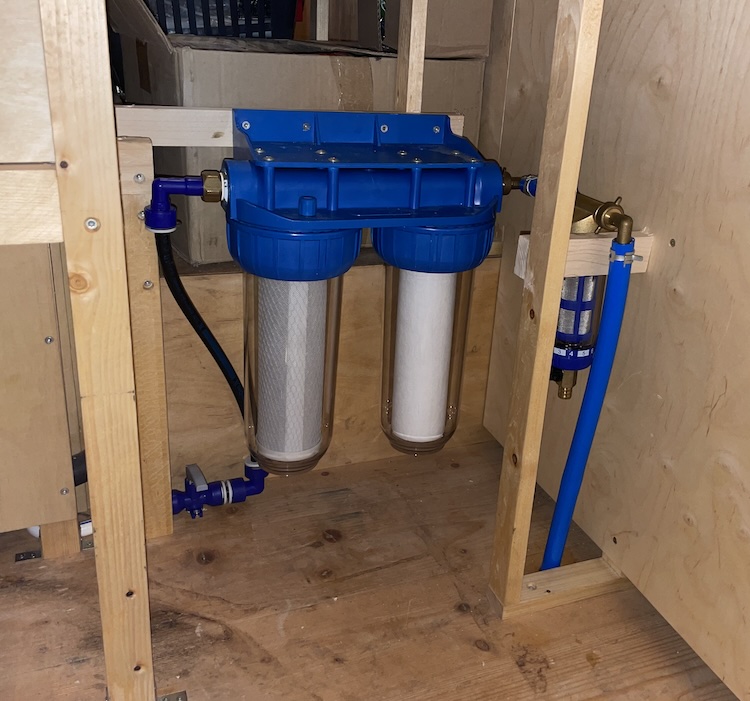
Inside the cabin, I installed a washable 40 micron pre-filter followed by an activated carbon and a 0.3µ ceramic filter. The drain valve followed the filters. This arrangement allowed me to flush the filters after a long period of inactivity by closing the valve 4a and opening the drain valve.
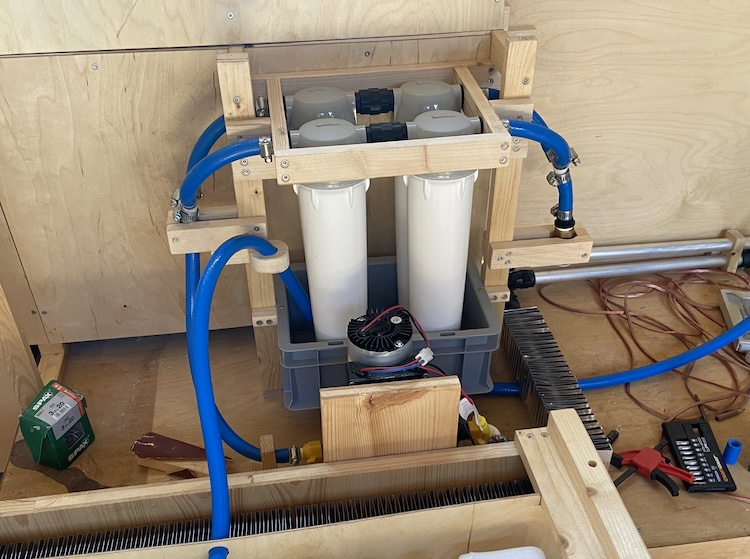
To prevent potential contaminants in the tank from entering the plumbing system, I implemented an additional filtering system after the pressure water pump. As the pump in the cabin had slightly less power than the external pump, I chose to arrange two rows of filters in parallel to enhance the flow.
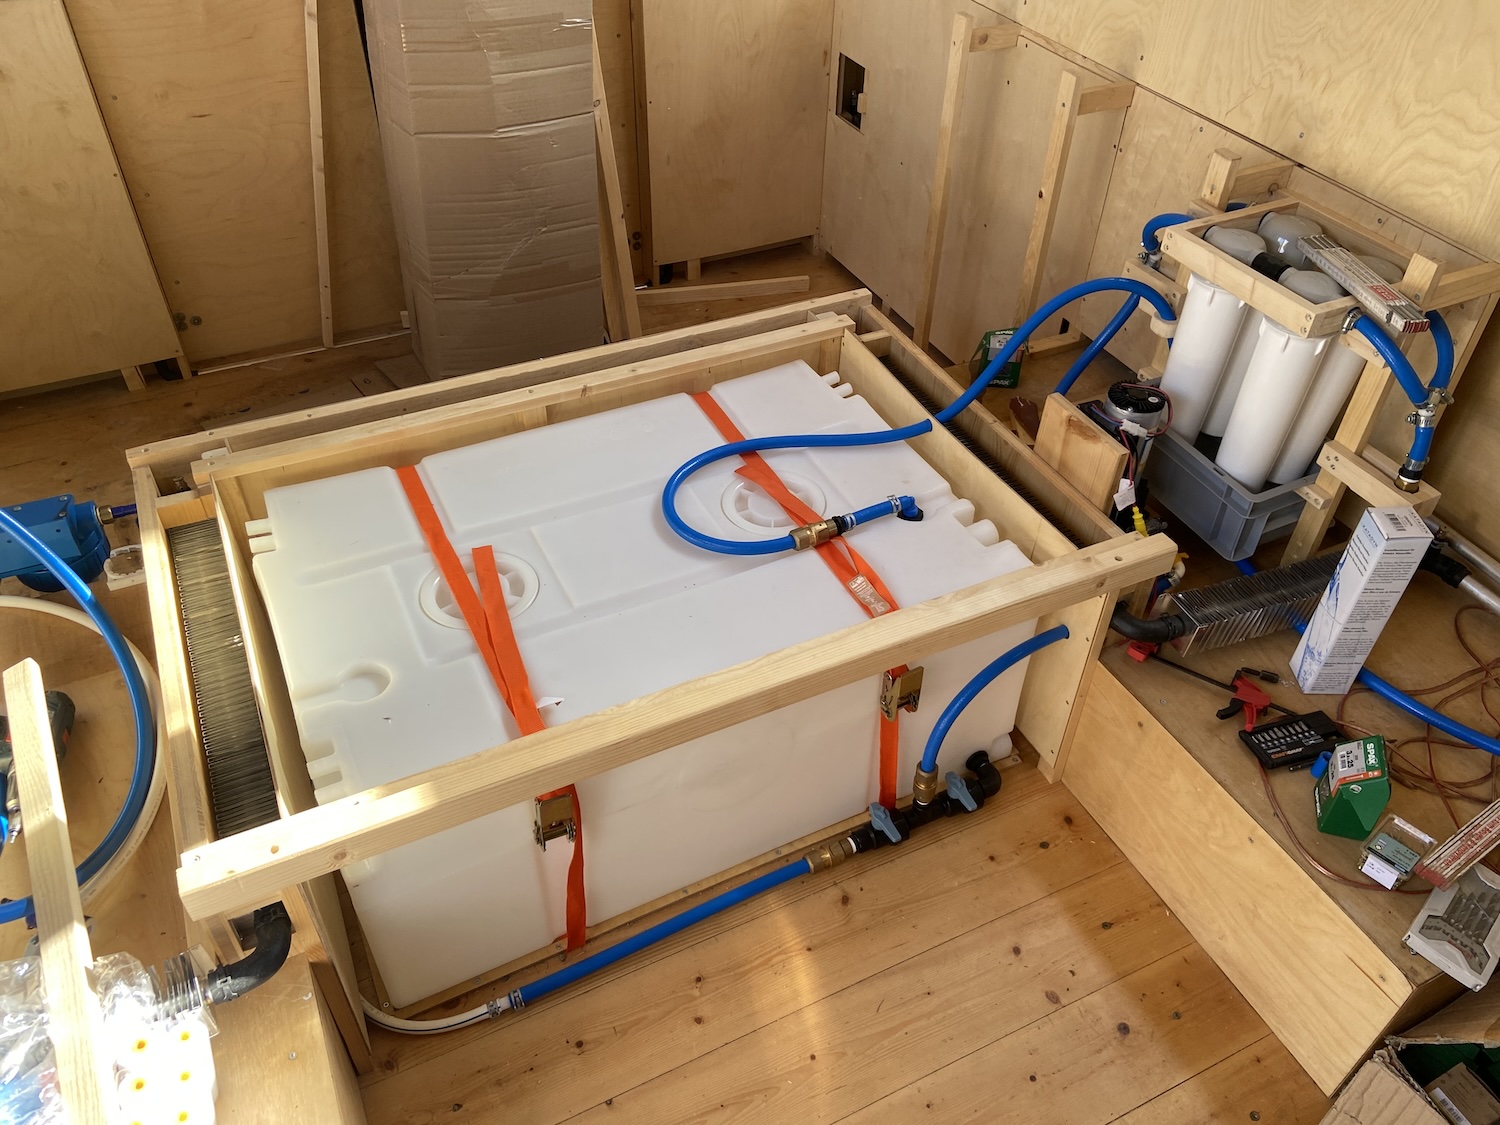
Installing the water tank
To anchor the 200-liter water tank to the floor between the ventilation shafts, I affixed two tension straps and small braces that firmly secured the tank in place, preventing any sliding.
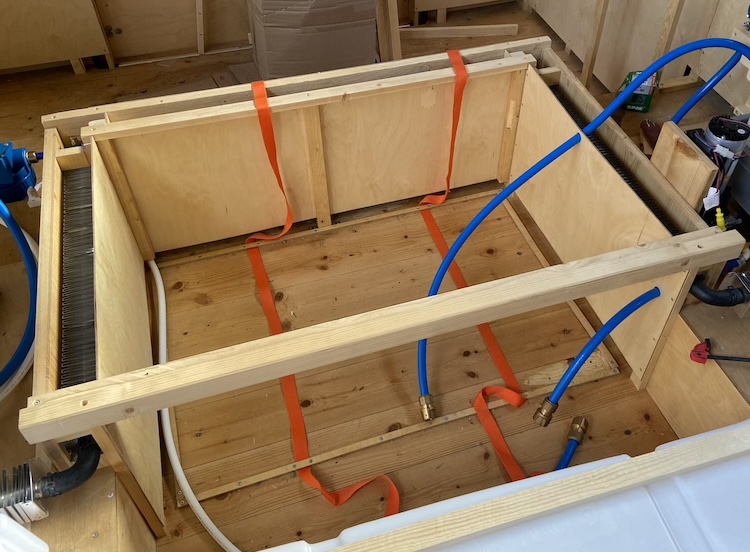
Thanks to quick couplings, connecting the tank to the pre-filters, post-filters, and the vent and overflow hose was quick and easy, simplifying the regular cleaning process.