After installing the solar panels, I focused on the electrical system of the cabin. I envisioned a setup comparable to a regular house providing sufficient capacity during the winter, several 230V AC, 24V DC, 12V DC and USB power outlets for all kind of consumers. I also wanted to be able to operate professional power tools without having to worry during cloudy days, so the setup I envisioned for the truck was meant to become a little more complicated than the one of my van.
Picking the components
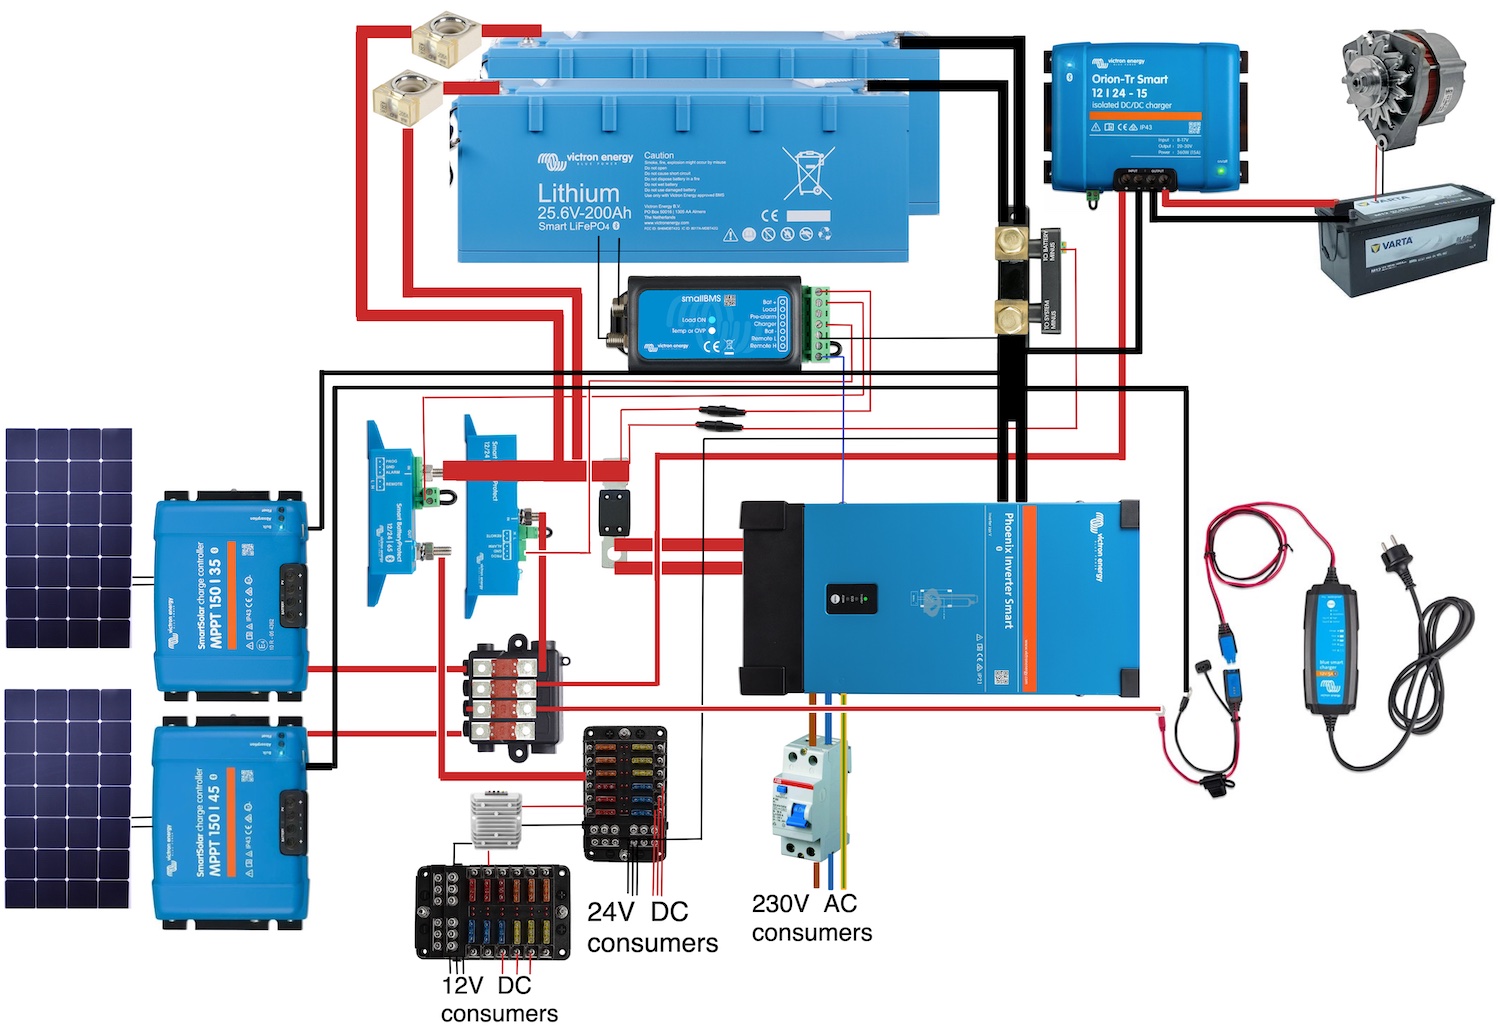
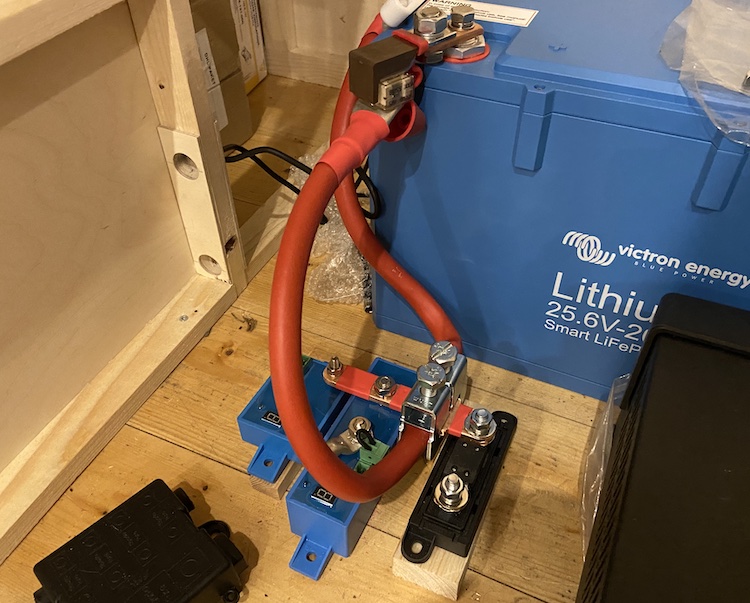
Similar to how I had increased the total power of the solar system by a factor of four, I also bought four times the battery capacity. I increased the basic voltage from 12V up to 24V to cut the required cross-section of the cables in half. While my van was equipped with a 200Ah 12V lithium battery, I had ordered two 200Ah 24(25,6)V lithium batteries which resulted in a total capacity of 10.2kWh for the truck.
The 2200Wp solar system was meant to be the main source of power. I planned to operate two solar charge controllers in parallel. One for the five solar panels on the front roof, which were connected in series and able to deliver about 1000W at a voltage of about 100V. And another charge controller for the six solar panels on the back roof, which were also connected in series and able to deliver about 1200W at a voltage of about 120V.
For unexpected emergencies, I wanted to be able to charge the 24V batteries by connecting the truck’s 12V alternator through a DC-DC charger or an external 230V power source.
I bought most of the electrical components right after starting the truck project in 2021. I luckily placed the orders just a few months before we faced a global energy crisis that resulted in high prices and low availability of products related to solar energy. Even before the crisis, certain devices were hard to get, because global supply chains were heavily interrupted by the effects of the Corona pandemic.
I was quite happy with the 12V DC boiler in my van, however all DC boilers I could find were out of stock and not deliverable. After sending several emails and making a bunch of phone calls, I finally gave up on a DC boiler and managed to get hold on a left-over 230V AC boiler that suited my needs.
Because of the boiler, I had to rely on a permanent 230V AC system, so I decided to switch from a 12V compressor cooler to a regular 230V refrigerator. Domestic refrigerator offered a separate freezer and were almost six times cheaper than coolers optimized for campers. I had enough space in the truck and had to setup a proper 230V AC system for the boiler anyways, so it seemed worth to try a domestic fridge.
The 2000W induction cooker in my van did a good job. However, I sometimes missed a second cooking element, so I went for a 3500W induction cooker with two elements.
Once I had picked all the 230V AC consumers, it was obvious that I needed a very powerful and reliable inverter. In contrast to the setup in my van, the inverter of the truck had to constantly provide voltage to ensure that the fridge or boiler could automatically run when needed. Reading through the specs of several inverters made me worry about the energy I’d lose while running the inverter for 24 hours every day. Depending on the brand, some inverters would consume up to 2A while idling. Good ones seemed to get along with 1A. But even 1A meant wasting about 25W for nothing which summed up to 600Wh a day. 600Wh of energy was more than I needed for a regular working day on my laptop. ![]()
I started questioning my setup. But the interrupted supply chains forced me to stick to the 230V system. The Phoenix inverter of Victron Energy caught my attention. It was equipped with a smart eco-mode feature that would shut down the inverter while idling and regularly provide a voltage of 230V to shortly check if any consumers were active. The duration of the intervals and the power thresholds were configurable and made it possible to operate the inverter with only 2W in idle mode. 48Wh a day seemed very acceptable and much better than 600Wh. I had made great experiences with Victron Energy’s products in my van. I didn’t find any other options, so I ended up accepting the high price and bought a Phoenix inverter. I picked the 24V and 5000W version which provided enough capacity for my domestic consumers and all my power tools.
While I spent a couple of days for looking for a suitable inverter, I was much faster selecting the remaining components of the system like a battery management system for balancing the cells, a battery monitor to measure the voltage, current and capacity of the batteries, a 65A battery protector for the DC consumers, a 100A battery protector for the chargers, a 24V to 12V DC-DC converter, a residual-current device to protect the 230V AC system against circuits, fuse boxes, cables, lugs and so on. I finally had all the components and was ready to wire them up!
Wiring the components
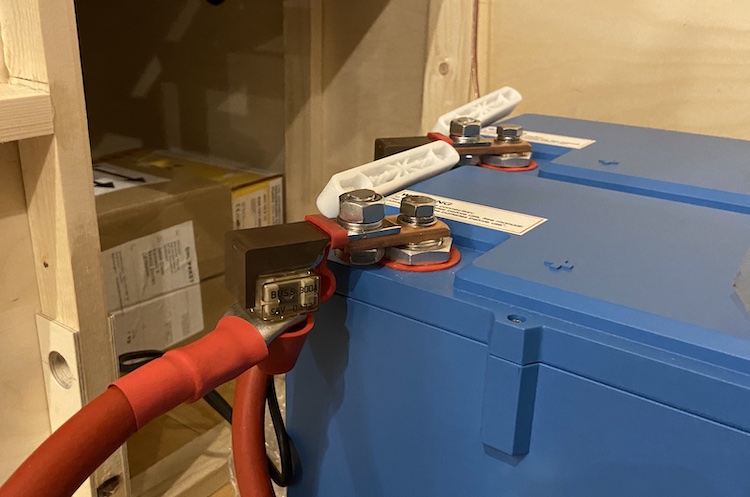
The Phoenix 24/5000 inverter supported a peak power of 10000W, so I had to pick proper cables that would be able to handle about 400A. After reading through the Information Technology Society’s DIN VDE 0298-4 specification that defined current carrying capacities for cables, I decided to use two 95mm² cables to connect the batteries.
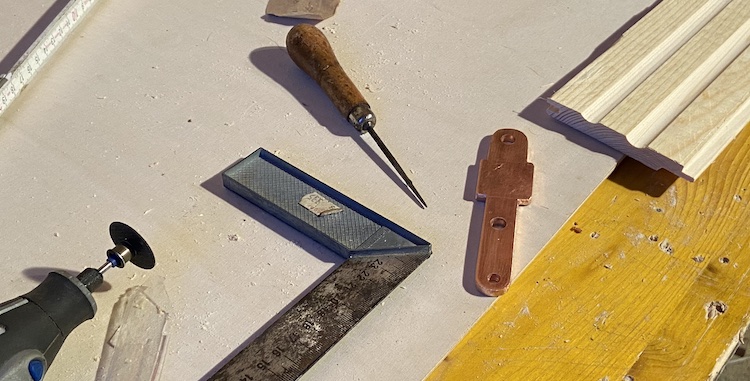
I preferred to protect the system against circuits as close to the battery poles as possible. During my research, I found out about CF8 fuses that could be mounted directly on the battery without requiring wires between the battery and the fuse. As I had limited height available, I needed to build a little adapter out of copper that allowed me to mount the fuses in a way that wouldn’t require additional vertical space.
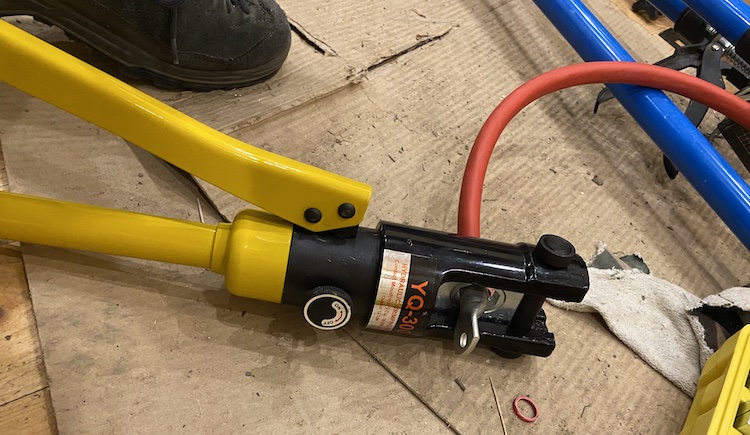
Pressing the lugs on the gigantic cables was quite time consuming and required a big hydraulic press.
I built a bunch of custom copper bars to reduce the number of cables and lugs.
These copper bars allowed me to efficiently connect the electrical components without needing a lot of space.
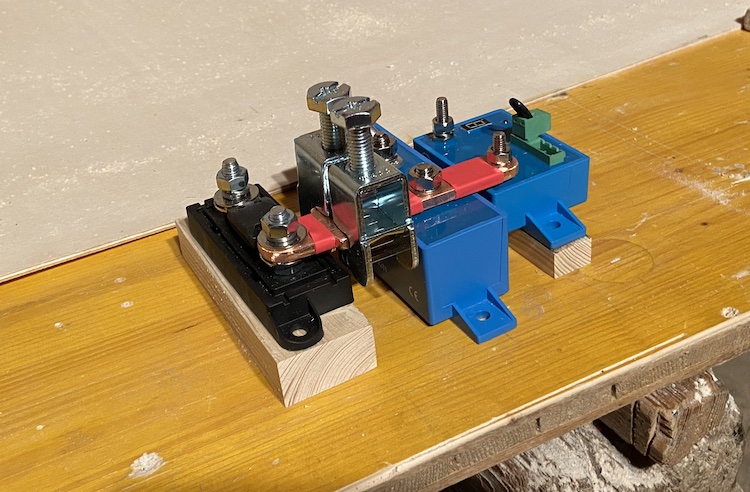
During my research, I found solid clamps that were used to connect cables with copper bars in industrial applications.
I saved a lot of time and money using these clamps because I didn’t have to press lugs on all the cables. Compared to the over-priced bus-bars that were advertised on several van, RV and boat shops, the industrial clamps were quite affordable. Most of these expensive bus-bars didn’t even support more than 200A. I struggled finding bus-bars that suited my needs, so I ended up building my own bus-bars using simple copper bars and the clamps. My custom bus-bars were much cheaper and able to handle more than 400A. Connecting the cables was also very pleasant. I liked them a lot!
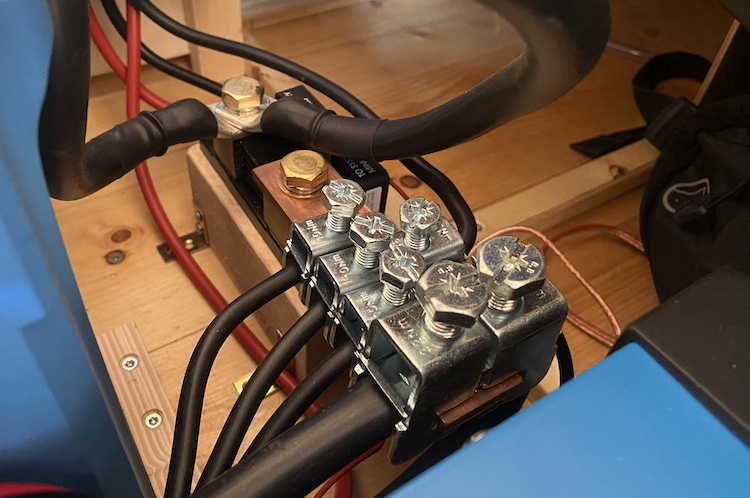
Each consumer and each charger was separately protected by a matching fuse: a 400A MEGA fuse for the inverter, several MIDI fuses for the chargers and blade fuses for the 24V and 12V consumers.

The custom bus-bars helped a lot to fit all components into the limited space between the bathroom and the wardrobe.
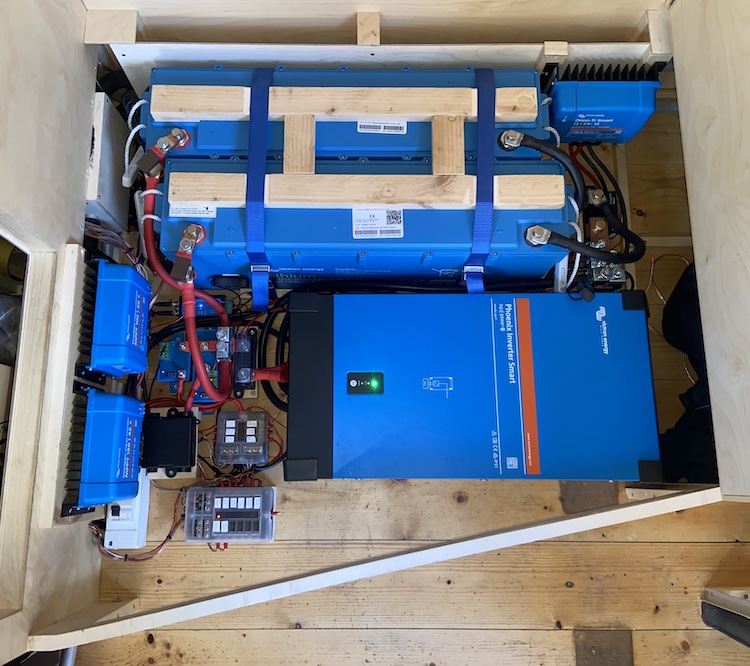
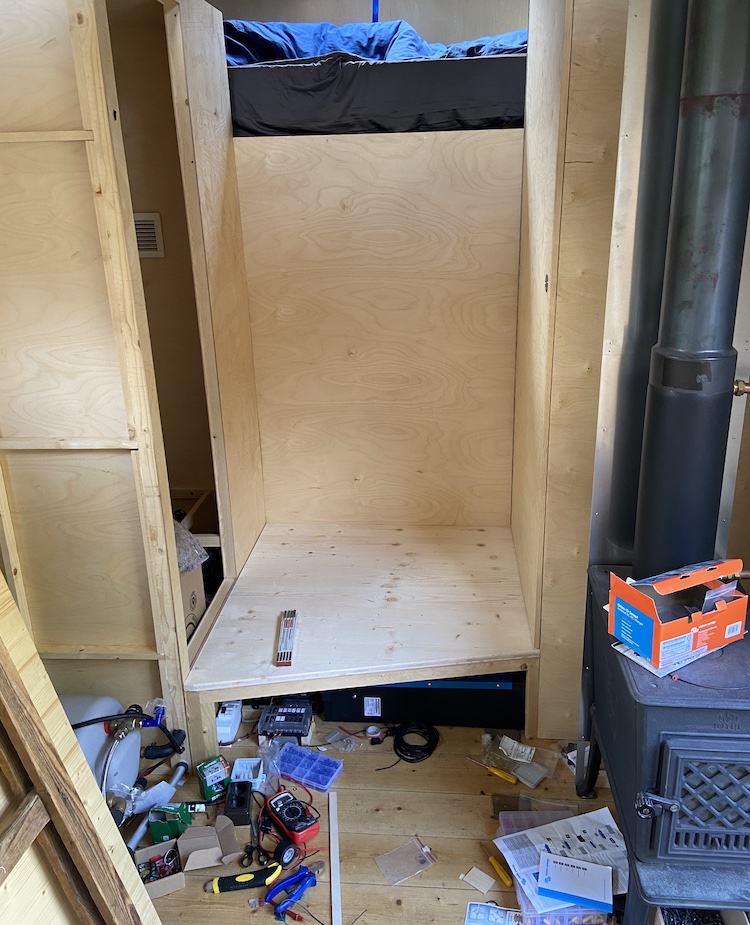
Once everything was installed and wired up, I cut, sanded and waxed a thick wooden panel to cover the electrical system.
Testing the system
The system was ready for the first test: I connected a bunch of power tools to the truck’s 230V system: a heat gun, two flood lamps, a table saw and a drill press.
I was finally able to autonomously supply the entire workshop with solar energy. Amazing! ![]()
![]()